
Your Ultimate Guide to Setting Up a MikroTik RADIUS Server
Learn how to configure a MikroTik RADIUS server for PPPoE and Hotspot authentication. A practical guide with RouterOS v7 tips and billing integration.

If you've ever had to manage more than a couple of MikroTik routers, you know the headache of local user accounts. It works fine when you're starting out, but as your network expands, that approach simply doesn't scale.
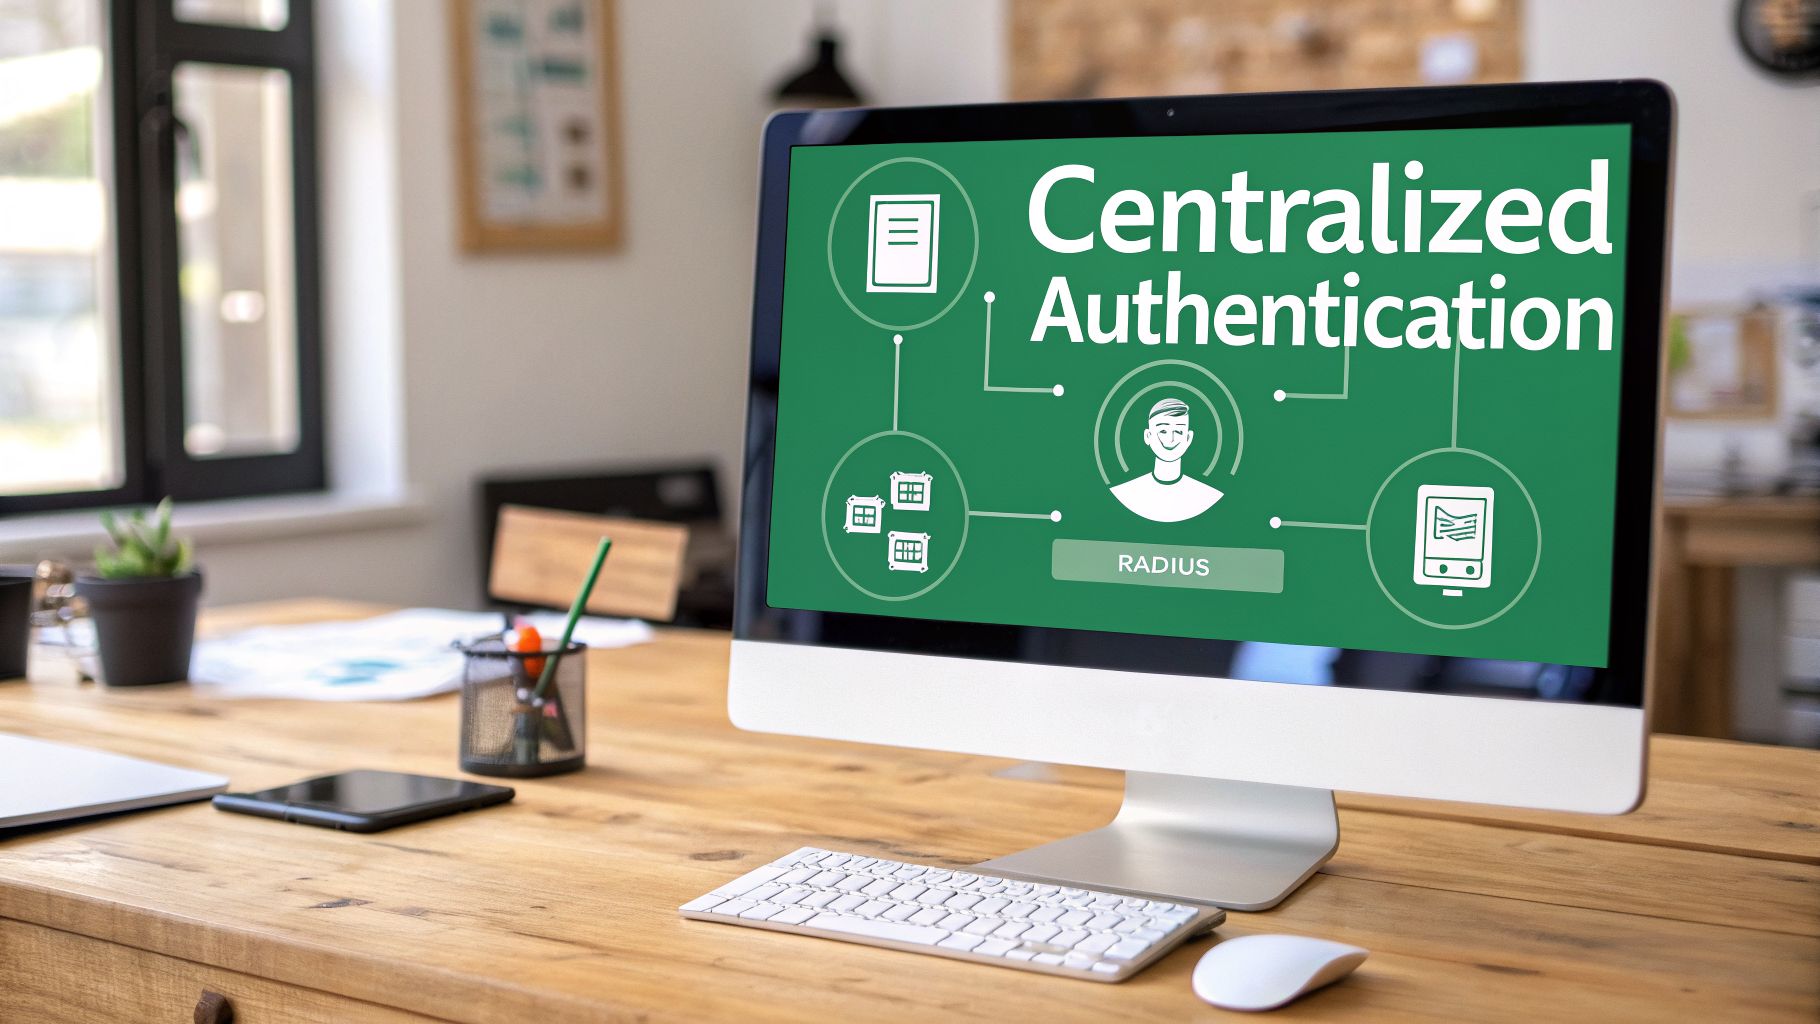
This is where a MikroTik RADIUS server comes in, and it's a real game-changer. By centralising user management through the industry-standard AAA framework—Authentication, Authorisation, and Accounting—you can build a network that's not only more secure but also far easier to manage.
Why Centralised Authentication Is a Game-Changer
Running an ISP or a public Wi-Fi network with MikroTik means you've likely felt the pain of local user management. Every time you need to create, update, or remove a user, you have to log into each router individually. This isn't just tedious; it’s a recipe for mistakes, inconsistent policies, and serious security gaps.
Think about it. A customer needs a new password or a plan upgrade. With ten routers, that’s ten separate logins and ten chances to get it wrong. Now, picture doing that for hundreds of users. It's an operational nightmare that actively holds your business back.
The Power of a Central System
Implementing a MikroTik RADIUS server flips this script entirely. Instead of keeping user profiles on each router, your MikroTik devices (which act as Network Access Servers, or NAS) will simply ask a central RADIUS server if a user is allowed to connect. This gives you a single, authoritative source for all credentials and service policies.
Before we dive deeper, let's look at a quick comparison to really see the difference.
Local vs Centralised RADIUS Management on MikroTik
This table shows the operational differences between managing users on each router versus using a centralised RADIUS server.
Feature | Local User Management | Centralised RADIUS Server |
|---|---|---|
User Database | Stored on each router individually | A single database on a dedicated server |
Making a Change | Must log into every router to update | Make the change once in the central system |
Policy Consistency | Prone to errors and inconsistencies | Policies are enforced uniformly everywhere |
Security Auditing | Difficult; logs are scattered | Simplified; all logs are in one place |
Scalability | Poor; management overhead grows with each new router | Excellent; add new routers without new user config |
Billing Integration | Manual or requires complex scripting | Straightforward and enables full automation |
As you can see, shifting to a central server isn't just a minor tweak—it fundamentally changes how you operate your network for the better.
The operational advantages are huge:
Unified User Management: Create, modify, and suspend user accounts from a single dashboard. Any change you make is instantly active across your entire network.
Consistent Policy Enforcement: Set up bandwidth limits, data caps, and access rules for different plans or groups. Every user gets the same experience, no matter which access point they connect through.
Enhanced Security: With all authentication requests funnelled to one place, you get a crystal-clear view of who is on your network. Auditing becomes simple, and spotting unusual activity is much faster.
Built for Growth: Adding a new router is incredibly easy. Just point it to your RADIUS server, and it's ready to go, complete with all your existing user profiles and policies.
A centralised RADIUS server transforms network administration from a repetitive, device-by-device chore into a streamlined, policy-driven operation. It's the foundational step for any serious ISP or Wi-Fi provider looking to scale effectively.
The benefits multiply when you connect this setup to an ISP billing platform. For example, a system like Centipid can automatically manage your RADIUS users based on customer subscriptions and payments. This turns your network infrastructure into a powerful business tool, automating everything from account creation to service suspension for non-payment, as shown at centipidbilling.com.
You can find detailed guides on how to set this up in their official documentation.
Planning Your RADIUS Deployment
I've seen far too many networks stumble because the RADIUS setup was just an afterthought. Diving in without a solid plan is a sure-fire way to create a system that's unstable, insecure, and can't handle growth. Taking the time to plan properly isn't just a recommendation; it's the single most important thing you can do to build a professional-grade network.
Getting your hardware, software, and network design sorted out from day one will save you countless headaches and late-night troubleshooting sessions down the line. Think of this as laying the foundation for your entire ISP operation.
Choosing the Right Hardware for Your Server
First things first, you need to decide where your RADIUS server is going to live. The machine you pick has a direct impact on performance, especially as your subscriber base grows. You don't need a supercomputer, but skimping on hardware will lead to slow logins and frustrated customers.
Here's what I've found matters most from experience:
CPU: Authenticating users isn't super demanding on its own. For most setups, even with thousands of users, a modern dual-core or quad-core processor will do the job just fine.
RAM: This is where you don't want to cut corners. FreeRADIUS can be memory-hungry, especially with many concurrent authentications and accounting logs piling up. I'd say 4 GB of RAM is the absolute minimum to start. If you're planning to scale beyond 5,000 active users, you should really be looking at 8 GB or more.
Storage: Go with an SSD. The difference in speed for database queries and writing logs is night and day. A 120-250 GB SSD is usually a good sweet spot, giving you enough room for the OS, RADIUS software, and years of log data for a medium-sized network.
A common but costly mistake is running a critical service like RADIUS on a shared desktop or a low-power device. Your authentication server is the heart of your network's access control. It absolutely needs its own dedicated server or a properly resourced virtual machine (VM). This is non-negotiable for a serious business.
Selecting Your RADIUS Software
With the hardware sorted, it's time to pick your software. In the MikroTik world, this usually boils down to two main contenders.
FreeRADIUS vs. MikroTik User Manager
Feature | MikroTik User Manager | FreeRADIUS |
|---|---|---|
Best For | Small, simple setups (e.g., a single cafe) | Growing ISPs and complex networks |
Platform | Runs directly on a MikroTik router | Runs on a separate Linux/Windows server |
Scalability | Limited by the router's hardware | Extremely high, can handle millions of users |
Flexibility | Basic features, limited customisation | Highly customisable with extensive modules |
Integration | Simple to set up with RouterOS | Powers most professional ISP billing systems |
For any deployment that needs to be reliable and scalable, FreeRADIUS is the undisputed industry standard. Its power and flexibility are unmatched, and it's backed by a massive community. More importantly, it's designed to integrate with external databases and powerful billing platforms like Centipid, which lets you automate your entire subscriber management and billing cycle, a process you can explore at https://docs.centipidbilling.com.
While MikroTik's User Manager is handy for a tiny hotspot, it just doesn't have the muscle for a growing ISP and will quickly become a performance bottleneck.
Critical Network Prerequisites
A RADIUS server is completely useless if your routers can't talk to it reliably. This might sound obvious, but you’d be surprised how often basic network connectivity is the root of all problems. Before you even think about installing software, make sure your network is ready.
There are a few things you absolutely must have in place:
A static IP address for your RADIUS server. This is crucial. Your MikroTik routers need to know exactly where to send authentication requests, every single time. Using DHCP for your server is just asking for trouble.
Rock-solid connectivity between routers and the server. Any packet loss or high latency on this link will translate directly into failed or painfully slow logons for your users.
The right firewall rules. RADIUS communicates over specific UDP ports, typically 1812 for authentication and 1813 for accounting. You have to ensure that firewalls—both on the server itself and any network gear in between—are configured to allow this traffic from your routers.
Clear network documentation. At a minimum, draw a simple diagram of your network. Write down the IP addresses of your RADIUS server and all your MikroTik routers (NAS devices). This document will be your best friend during setup and troubleshooting. This is also a great time to map out other services, like how you'll manage prepaid access. If that's on your roadmap, our guide on creating and managing internet vouchers has some useful ideas you can build on.
Installing and Configuring Your FreeRADIUS Server
Alright, with the planning out of the way, it's time to get our hands dirty. This is where we install FreeRADIUS, the open-source workhorse that will act as the brains for your network's authentication. We'll walk through the essentials of getting it up and running on a Linux system like Ubuntu.
Our main goal here is to establish a working handshake between your MikroTik router and your new MikroTik RADIUS server. This boils down to three core tasks: installing the software, telling FreeRADIUS about your routers, and setting up a test user to make sure it all works.
This flowchart maps out the entire journey, from sorting out your hardware and software to integrating it into your live network.
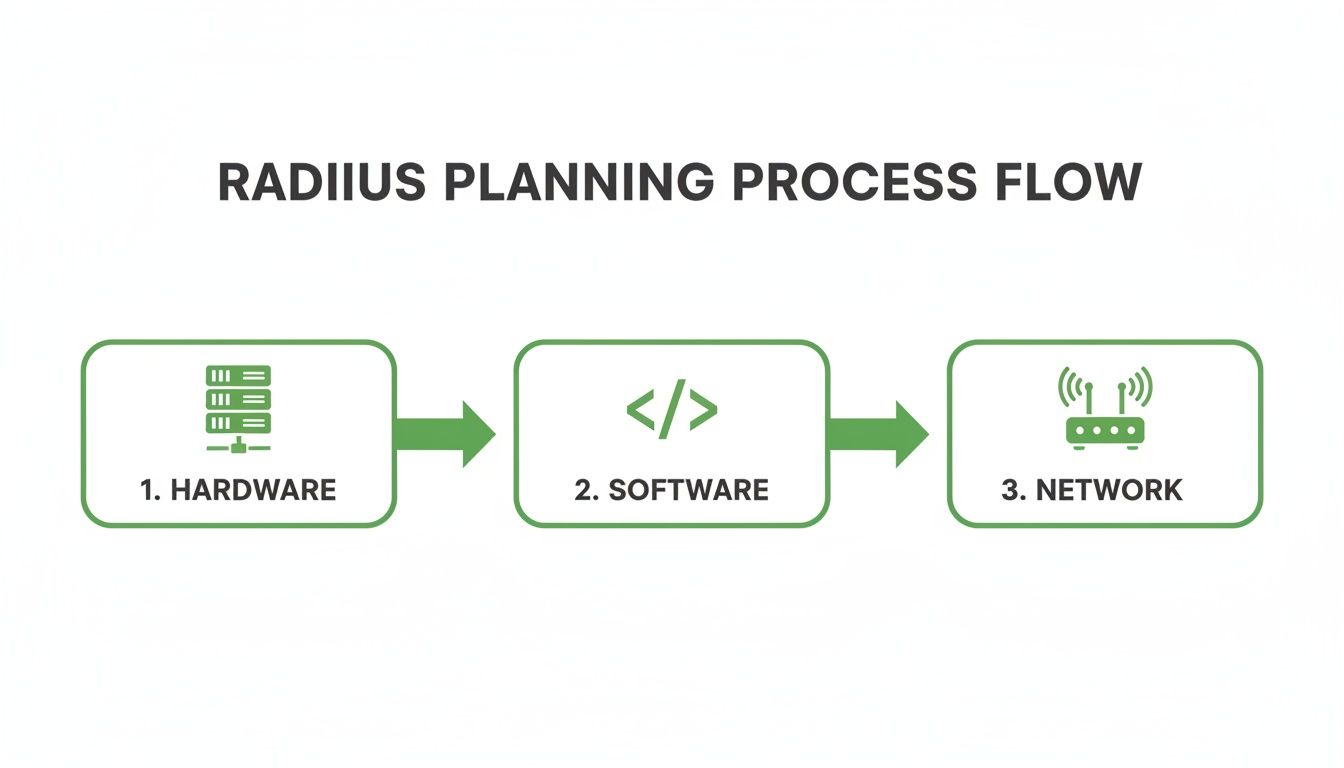
As you can see, a successful deployment really depends on getting these three pillars—hardware, software, and network—to work together perfectly.
Getting FreeRADIUS Installed
First things first, you need the FreeRADIUS software on your server. For most Debian-based systems, including Ubuntu, this is refreshingly simple. You just use the system's package manager to install the main freeradius package and a few common utilities.
Once installed, the system sets up all the default configuration files for you, typically inside the /etc/freeradius/ directory. It also creates the service scripts needed to start and stop the server, which is a nice touch.
Adding Your MikroTik Routers as Clients
Out of the box, your RADIUS server is locked down. It won't listen to requests from just any device on the network. You have to explicitly tell it which devices to trust—these are your MikroTik routers. This is all handled in a configuration file named clients.conf.
In RADIUS terminology, each router is a NAS (Network Access Server). For every router you want to connect, you'll add a new entry in clients.conf. This entry needs two key pieces of information: the router's IP address and a shared secret. Think of the shared secret as a unique password that both the router and the RADIUS server must know to communicate.
The shared secret is the cornerstone of your RADIUS security. Make it strong, and make it unique for every router. If this secret is compromised, an attacker could potentially impersonate your router and flood your network with fake authentication requests. Don't get lazy and reuse passwords here.
For instance, if your router's IP is 10.10.1.1, your entry in clients.conf would look something like this:
client my_main_router {
ipaddr = 10.10.1.1
secret = ThisIsAVeryStrongSecret123!
}
This tells FreeRADIUS to trust any request coming from 10.10.1.1 as long as it provides that specific secret.
Creating Your First Test User
Now that your server trusts your router, you need a user to test the connection. In a basic FreeRADIUS setup, user accounts are defined in a file named, quite simply, users. This file is where you set usernames, passwords, and the specific attributes that control what a user can and can't do.
For a quick first test, a simple entry will do the trick.
testuser Cleartext-Password := "password123"
Service-Type = Framed-User,
Framed-Protocol = PPP
This creates a user called testuser with the password password123. The other lines are standard RADIUS attributes that signal to the MikroTik that this is a typical PPPoE user.
Using RADIUS Attributes for MikroTik
This is where you start to see the real power of a MikroTik RADIUS server. By adding specific attributes to user profiles in the users file, you can centrally manage their sessions. For MikroTik, two of the most valuable attributes are:
Framed-IP-Address: This assigns a specific, static IP address to a user every time they connect. It's crucial for business clients or anyone who needs a permanent IP.Mikrotik-Rate-Limit: This is a vendor-specific attribute that lets you control a user's bandwidth directly from RADIUS. You can define upload/download speeds, burst rates, and more, which makes creating different service plans a breeze.
These attributes are game-changers for network operators. In the KE region, for example, where small and mid-sized ISPs lean heavily on MikroTik RouterOS for PPPoE, RADIUS integration has proven to dramatically improve efficiency. One recent analysis showed that MikroTik-based networks using RADIUS experienced a 35% reduction in authentication-related downtime.
What’s more, a 2026 survey of Kenyan WISPs found that 78% rely on FreeRADIUS or MikroTik User Manager for AAA services. This setup allows them to manage over 2.5 million unique sessions each month, using dynamic IP assignment and enforcing bandwidth policies that have cut unauthorised overuse by 42%. You can dive deeper into these trends and their operational impact by exploring these regional ISP insights.
The Invaluable Debugging Mode
Here’s a piece of advice that will save you countless hours of frustration: run FreeRADIUS in debugging mode. Instead of letting it run quietly as a background service, fire it up directly from your terminal with the command freeradius -X.
This starts the server in the foreground and spits out a real-time log of everything happening. You’ll see the incoming requests from your MikroTik, watch how the server processes them, and see the exact reply it sends back. It is, without a doubt, the fastest way to diagnose problems like a mismatched shared secret or a typo in a username.
Configuring MikroTik RouterOS v7 for RADIUS
Alright, your FreeRADIUS server is up and running. Now for the fun part: getting it to talk to your MikroTik router. This is where we'll configure RouterOS v7 to hand off all its authentication work, turning your powerful router into a smart client for your new centralised server.
This connection is the key to managing your network efficiently. Let's get it set up for your PPPoE or Hotspot services.
Adding Your RADIUS Server to MikroTik
First things first, you need to introduce your MikroTik to the RADIUS server. We'll do this from the /radius menu in RouterOS. This is where you define the server's location and the credentials needed for a secure handshake.
You’re going to add a new entry with two absolutely critical details:
Address: This is the static IP address of your RADIUS server. You should have this from the planning phase.
Secret: The shared secret you created in the FreeRADIUS
clients.conffile. It has to match exactly on both the server and the router—no exceptions.
While you're in this menu, you also need to specify which services will use this RADIUS server. If you’re running a PPPoE network, tick the ppp service. For guest Wi-Fi, you’ll enable the hotspot service. Don't worry, you can select multiple services for a single RADIUS entry.
This simple interface is the nerve centre for the whole setup. Get this right, and all your authentication and accounting packets will flow to the correct destination.
Enabling RADIUS on PPPoE and Hotspot Servers
Here's a step that trips up a lot of people. Just adding the server isn't enough. You've told the router where the RADIUS server is, but you haven't yet told your PPPoE and Hotspot services to actually use it.
For PPPoE services, head over to the PPP menu. Go into your PPPoE server settings and, under the Authentication section, simply tick the box for Use RADIUS.
For Hotspot services, the process is similar. Navigate to IP -> Hotspot, open your active Server Profile, click the RADIUS tab, and check the Use RADIUS box.
As soon as you enable this, the router stops checking its local user database. All login requests for that service will now be sent directly to your MikroTik RADIUS server. If you want to dig deeper into what MikroTik can do, feel free to check out our other guides on MikroTik configurations.
Common Mistake: A mismatched shared secret is the number one reason for "RADIUS server not responding" errors. The secret is case-sensitive, so double- and triple-check it. The other common culprit is a firewall on the RADIUS server blocking UDP ports 1812 (authentication) and 1813 (accounting). Always check your firewall rules.
The Importance of Interim Updates for Accounting
Getting users authenticated is only half the job. For any professional service, you absolutely need accounting to track data usage, session times, and other crucial metrics. In your Hotspot or PPP RADIUS settings, you must enable Accounting and, most importantly, set an Interim Update interval.
The Interim Update setting tells your MikroTik how often to send accounting data packets to the RADIUS server for an active user session. Without it, your server would only know when a user connects and disconnects. With it, you get regular updates—say, every 10 minutes—on how much data they've consumed. This near real-time data is what allows a billing system like Centipid to enforce data caps, manage prepaid plans, and generate accurate reports. You can see how this works in detail by visiting their official documentation at https://docs.centipidbilling.com.
This feature is particularly vital for ISPs in KE's dynamic markets. A 2026 case study by Centipid Technologies Ltd. highlighted a Kisii-based ISP with 12,000 subscribers that achieved 98.7% uptime using PPPoE with RADIUS. In fact, 2026 forum polls showed that 85% of MikroTik admins in KE prefer an interim-update of 600 seconds for precise invoicing. Since RouterOS v7's launch, operators have also reported 47% faster profile provisioning by using the Mikrotik-Group attribute, a game-changer for multi-site networks. For a closer look at these RADIUS features, check out MikroTik's official documentation.
Automating Your ISP with Centipid Billing Integration
Getting a MikroTik RADIUS server up and running is a huge technical win. But on its own, a RADIUS server is just a gatekeeper—it authenticates users but doesn't handle the business side of things like collecting payments or managing subscriptions. This is where you connect your technical setup to a commercial engine.
Think of a platform like Centipid ISP Billing as the business brain that plugs directly into your RADIUS infrastructure. It completely takes over the tedious work of managing users in text files or a local database. Instead of living in the command line, you’re now managing your entire operation from a simple web dashboard where your business rules automatically control the network, a capability detailed at https://docs.centipidbilling.com.
From Manual Edits to Automated Management
Once integrated, you’ll find your role shifts dramatically. You're no longer just a network administrator; you're running a business. All the core tasks—creating internet packages, signing up new subscribers, and generating their credentials—are automated through one central, user-friendly interface.
Centipid takes care of creating the RADIUS users and automatically pushes the correct attributes based on the specific service plan a customer chooses.
Define Service Plans: You can easily build different internet packages with unique speeds, data limits, and pricing.
Automate User Provisioning: The moment a new customer signs up, Centipid instantly creates their RADIUS account with the right
Mikrotik-Rate-Limitand any other necessary attributes.Manage Subscribers Centrally: All your customer data, service status, and payment history are organised in one accessible location.
This screenshot from the official documentation at docs.centipidbilling.com gives you a clear idea of how service plans are managed within the billing system.
As you can see, every plan is directly linked to specific RADIUS attributes. This is the magic that connects your commercial offer to the technical enforcement happening on your MikroTik router.
Unlocking True Business Automation
The real power here isn't just creating users—it's about building a hands-off customer lifecycle that practically runs itself.
Picture this common scenario:
A new customer finds your service online and signs up through your company-branded portal.
They select a 20 Mbps package and complete the payment instantly via M-Pesa.
Centipid gets the payment confirmation and immediately provisions their RADIUS account.
An SMS with their new username and password is sent, and they can get online right away.
That entire sequence just happened without you needing to do a thing. But it doesn't stop there. The system also uses RADIUS accounting data, like Acct-Session-Time, to manage subscriptions. If a customer misses a payment, an automated dunning process begins, sending payment reminders before eventually suspending the service. You can get more insights on setting up these workflows in our article about choosing the right ISP billing software.
This kind of automation is a game-changer, especially for hotspot operators in Kenya. A 2026 study covering 200 MikroTik hotspot sites found that integrating with a RADIUS server boosted average revenue per user (ARPU) by 51%. For ISPs using Centipid Technologies Ltd., the cloud RADIUS sync feature unlocked multi-gateway payments that captured 67% more transactions through M-Pesa. Plus, accounting stats like Acct-Output-Octets were used to dynamically adjust rate limits and maintain a high quality of service for everyone. You can read more about these findings on MikroTik hotspot management.
By connecting your MikroTik RADIUS server to a proper billing platform, you're not just authenticating users; you're building a scalable and profitable ISP. For a full walkthrough, the detailed guides at https://docs.centipidbilling.com are always your best resource.
Troubleshooting, Security, and Scaling Your Setup
Let's be real: even the most carefully planned MikroTik RADIUS server will hit a bump in the road. Seeing that dreaded "RADIUS server is not responding" message in your MikroTik logs is practically a rite of passage for any network administrator. This section is your field guide for squashing those bugs and, just as importantly, hardening your server for the long haul.
Getting authentication to work is the first battle. Making it secure and ready for growth is how you win the war. We'll start with the most common failures I see in the wild before moving on to essential security and scaling strategies.
Debugging Common RADIUS Failures
When a user can't connect, the problem almost always boils down to a handful of usual suspects. Instead of randomly poking at settings, it pays to work through these checks methodically. You'll find the root cause much faster.
First, cover the absolute basics. Is the RADIUS server even online? Is the FreeRADIUS service actually running? A quick systemctl status freeradius on your Linux box will tell you what you need to know.
With that confirmed, it's time to dig a little deeper:
Mismatched Shared Secrets: This is the classic, number-one culprit. The secret is case-sensitive and must be a perfect match between your MikroTik
/radiusmenu and yourclients.conffile on the server. One wrong character, and every single request will be dead on arrival.Firewall Blockages: Running a close second is a firewall problem. Your RADIUS server needs to accept connections on UDP ports 1812 (for authentication) and 1813 (for accounting). Make sure the firewall on the server itself, and any other firewalls between it and the router, explicitly allow traffic from your MikroTik's IP address on these ports.
Incorrect IP Address: It sounds simple, but it happens. Double-check that the RADIUS server's IP is correctly entered in your MikroTik router. Then, on the server, ensure the client IP listed in
clients.confis the actual IP of the MikroTik router that's sending the requests.
If you've gone through that list and you're still stuck, you need more visibility. On the server side, you can run FreeRADIUS in full-on debug mode (freeradius -X) to see a live stream of incoming requests and errors. Back on the router, MikroTik's own packet sniffer (/tool sniffer) is brilliant for confirming if RADIUS packets are actually being sent out.
Essential Security Best Practices
Once everything is authenticating smoothly, your immediate next job is to lock it down. A compromised RADIUS server is a nightmare scenario that can take your whole network offline. Don't treat these steps as optional.
Your RADIUS server is the master key to your network. Treating its security as an afterthought is a risk no ISP can afford to take. Simple measures implemented today can prevent a major disaster tomorrow.
Follow these guidelines to harden your server:
Use Extremely Strong Secrets: Forget dictionary words or simple phrases. Generate a long, random string for your shared secret using a mix of upper and lower-case letters, numbers, and symbols. The longer and more random, the better.
Run Behind a Firewall: Your RADIUS server should never, ever be exposed directly to the public internet. It must sit behind a firewall, with rules that only permit access from the specific, known IP addresses of your MikroTik routers (NAS devices).
Restrict Client Access: Inside your
clients.conffile, be specific. Never define a client with a broad IP range. You should create a separate entry for each individual MikroTik NAS, identified by its static IP address. This stops rogue devices on your network from even trying to talk to the server.Perform Regular Backups: Your FreeRADIUS configuration and user database are priceless. Automate a regular backup schedule for your entire
/etc/freeradius/directory and any SQL database you're using. For peace of mind, store these backups off-site. For an even more hands-off approach, a managed platform like Centipid handles server security and backups as part of its service, as detailed in their official documentation.
For those managing MikroTik routers directly, becoming a power user of its main interface is a huge advantage. We've put together a detailed guide on using Winbox effectively that's packed with tips for smarter network management.
Preparing for Growth and Scalability
As your subscriber list grows, that single RADIUS server will eventually start to feel the pressure. Thinking about this now will save you from painful outages and frantic upgrades later.
Make sure your server hardware has room to breathe, especially when it comes to RAM and SSD speed—accounting logs can balloon in size surprisingly quickly.
For larger or geographically spread-out networks, start thinking about a RADIUS proxy architecture. This involves placing smaller proxy servers at key points in your network. They handle local requests and forward authentication traffic to a central, primary RADIUS server. This design dramatically improves resilience and can lower latency for your customers, a must-have for any ISP serious about scaling up.
Common Questions and Roadblocks
Even with a smooth setup, a few questions always pop up. Here are some answers to the most common queries we see from network admins getting started with MikroTik and RADIUS.
User Manager or FreeRADIUS? Which One Is Right for Me?
This is a classic crossroads. Think of MikroTik's built-in User Manager as the perfect tool for a small-scale, single-router environment—like a coffee shop hotspot or a small office. It's simple and gets the job done without needing a separate server.
But when you need to scale up, FreeRADIUS is the professional-grade choice. It's an incredibly powerful open-source solution built for ISP-level deployments. If you're managing thousands of users, need deep customisation, and plan to centralise authentication for multiple routers, FreeRADIUS is the only way to go.
Can I Give a Customer a Static Public IP Through RADIUS?
Yes, and it's a very common requirement. You can easily assign a specific IP address by adding the Framed-IP-Address attribute to that user's profile on the RADIUS server.
This is where an ISP billing system really shines. A platform like the one from centipidbilling.com can handle this automatically. You just assign the static IP to a customer's service plan in the web interface, and it pushes the correct configuration, completely removing any need for manual RADIUS file edits. For a deeper dive, their official documentation is a great resource: https://docs.centipidbilling.com.
How Are Prepaid Data Bundles Managed?
RADIUS is perfectly suited for this. It uses specific attributes, like Mikrotik-Total-Limit, to tell the router how much data a user is allowed.
The MikroTik router keeps track of the bytes going to and from the user, sending accounting updates back to the RADIUS server. As soon as that limit is hit, the server tells the router to either disconnect the session or apply a new, much slower speed policy. When integrated with a billing platform, this entire process—from purchase to enforcement to renewal—becomes completely automated, as documented at https://docs.centipidbilling.com.
It's time to take full control of your network and automate your operations. With Centipid Technologies Ltd., you can transform your MikroTik setup into a streamlined, revenue-generating machine. See for yourself how our platform simplifies subscriber management, billing, and network access control. Visit https://centipidbilling.com to get started with a free trial.